I love doing a DIY gua sha facial whenever my skin/face/upper body is feeling stressed. It’s a lovely relaxing ritual that eases facial tension and restores a beautiful glow to tired, over-worked skin. Plus, the slow, methodical movements require you to slow down, which produces a sort of meditative healing effect.
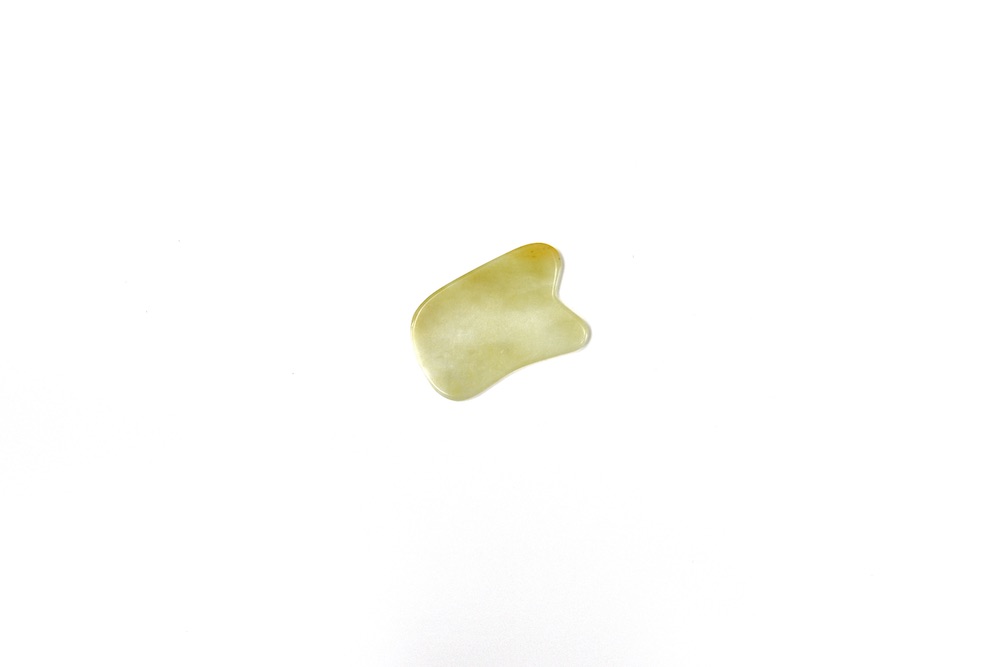
Gua sha is a self-care facial massage technique that uses a special jade stone to lightly caress the surface of the skin. The practice stems from Traditional Chinese Medicine.
When practiced regularly, gua sha massage can soften fine lines, eliminate puffiness, smooth skin’s texture, boost glow, and elevate overall appearance.
^ It can also help relieve TMJ or a chronically tight jaw! (If you grind your teeth at night, for example, you can do gua sha first thing in the morning to help loosen up the muscles along the jawline.)
To perform a DIY gua sha facial at home, all you need is a nice facial oil and jade gua sha tool, which are both easy to find on Amazon or Etsy.
(Please note: Gua sha tools are different from jade rollers! Jade rollers have a straight surface but gua sha tools are curved to cradle the contours of your face. This is specifically important because the curve in a gua sha tool works synergistically with the movements to produce the calming effect. This encourages lymphatic drainage and effleurage-style healing beneath the skin’s surface.)
The entire process takes about 5-10 minutes, but you can go longer or shorter depending on how you’re feeling.
After a long, stressful day, I like to extend the process and spend a full ten minutes massaging my face. Today, it’s one of my favorite relaxing nighttime rituals. I feel like I’m literally wiping the tension off my face!
Try it and see for yourself.
***
How to Use a Gua Sha Tool (DIY Gua Sha Facial)
- First, cleanse or splash clean skin with some cool water. Then, dry off and apply a few drops of facial oil. I love doing gua sha massage with organic rose facial oil, which is relaxing, invigorating, and said to elevate mood. (It’s also full of skin-protecting, anti-aging antioxidants!)
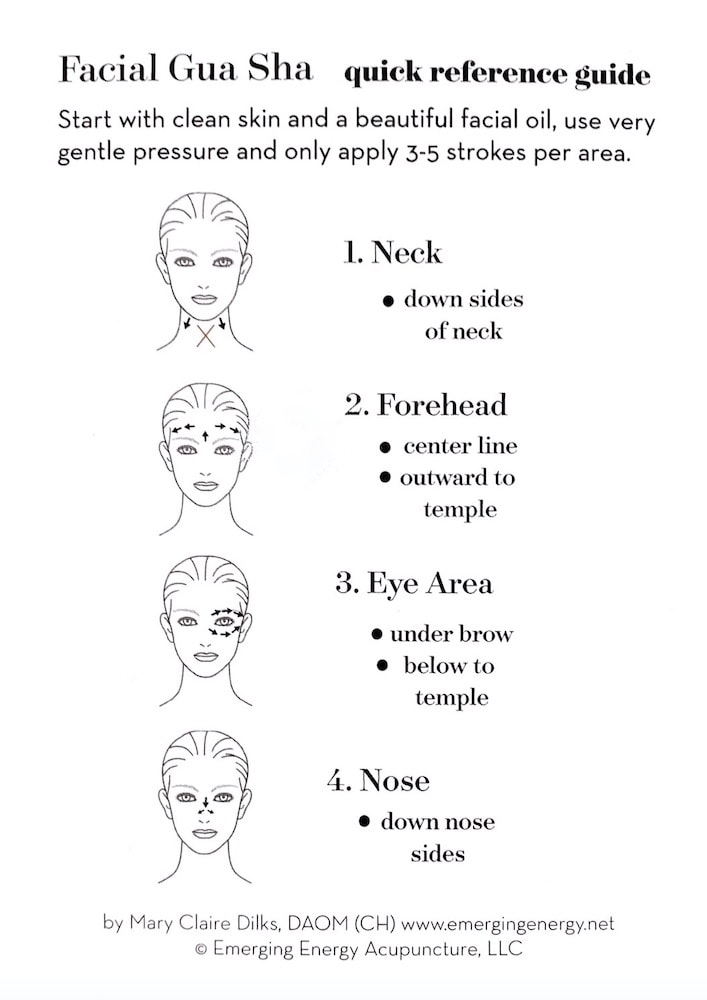
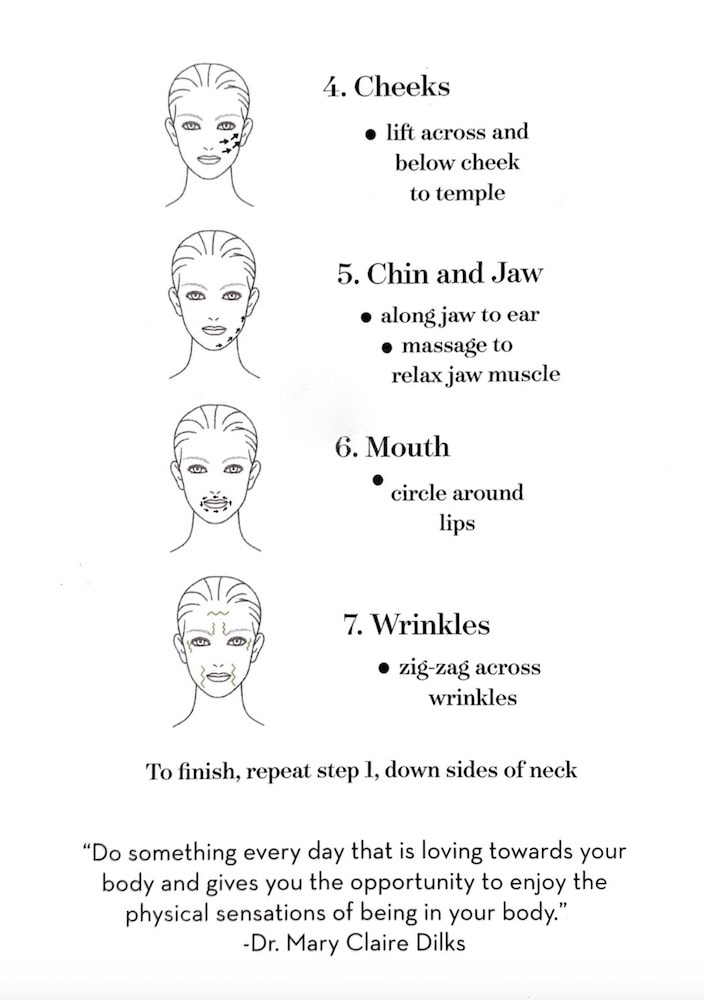
- Next, use your gua sha tool to massage your face according to the directions shown in the pictures below. Remember: you should only massage one side of your face at a time, always starting at the midpoint and working your way out towards the ears. Watch the video below for more detailed instructions, or follow along in real-time.


The above diagrams for this DIY gua sha facial are from Pearl Apothecary’s Gua Sha Facial Kit.
Pearl Apothecary is the in-house product line at Emerging Energy Acupuncture, a lovely modern acupuncture clinic in Providence, Rhode Island. (If you’re ever in the area, check them out! They do excellent professional gua sha facials that are so soothing and relaxing.)
Any good gua sha facial kit should come with instructions that show you how to do a DIY gua sha facial with a jade gua sha tool. (For example, Pearl Apothecary’s kit comes with some of their amazing coQ10 anti-ox serum and these written instructions.) They also have helpful videos, which I’ve linked below.
Watch the basic DIY gua sha facial tutorial, below.
Find more great products and natural serums on Emerging Energy Acupuncture‘s website.
Also: This article contains Amazon Affiliate links and also Etsy Affiliate links for easy shopping.
As an Amazon Affiliate and Etsy Affiliate, we may earn from qualifying purchases. This is why we work our butts off to personally test everything we write about. These are the products and providers we trust. (I don’t write about anything I don’t personally use myself.)
Enjoy!
***
Related: 7 Great Tips for Soothing Stressed Out Skin
7 Natural Face Moisturizers That Are Good for Mind, Body, and Earth
Want more beauty-based stress relief? Trying making this comforting DIY Lavender Body Butter— a balm to calm your skin and soothe your senses.

Leave a Reply